Friday, December 19, 2014

Ornaments

I can't believe Christmas is less than a week away.  I still have so much to do and a ton of it needs to be done by tomorrow afternoon (maybe finish the Santa red work pillow for my brother for the party tomorrow night).  Here are a few more ornaments I made.  I loved being able to use my stamps this year for more than just cards and tags.


Lawn Fawn

Hero Arts and Lawn Fawn

The owl ornament I modeled after a tag we made in a Copics coloring class I took in November with Sandy Allnock.  The stamps on that ornament are from Lawn Fawn.  One of my favorite stamp companies. I just adore all those critters.

The second one is the reindeer from Hero Arts and the trees are from Lawn Fawn also.  I used my white and black gel pens to add a little detail and the Lawn Fawn stitches hills for the snow banks.

Thanks for stopping by,

Melanie

Wednesday, December 10, 2014

Bugaboo Christmas Chaos - Day 5

It's day five of the Bugaboo Christmas Chaos challenge and today I whipped up Gus with cookies.  He's super cute and easy to do.

Bugaboo Stamps - Gus Cookies

I didn't do anything special on this one.  I used papers from the 6x6 paper pad Christmas Time by Carta Bella.  No extra embellishments at all.  I think my brother will like him just the way he is.

Thanks for stopping by,

Melanie

Tuesday, December 9, 2014

Christmas Chaos - Day 4

I'm back today with another card for the 2nd Annual Christmas Chaos challenge over at Bugaboo Stamps.  The challenge was to use 1 image, 2 of something, and 3 of something else.  I used the Winter Snowman image, two snowflake buttons, and three silver jewels (I colored them with Copics).

Bugaboo Stamps - Winter Snowman


I colored the image with my Copics, and used Wink of Stella in clear, green and yellow.  I also used some orange gel pen, Stickles, and Inkssentials Enamel Dots.  My papers are from the 6x6 paper pad "Tis the Season" by My Mind's Eye.

Thanks for stopping by,

Melanie

Sunday, December 7, 2014

Rudolph

Two posts in one day.  Not my usual, but I wanted to participate in the 2nd Annual Christmas Chaos over at Bugaboo Stamps, so I made a second card today.  This time I used Rudolph with Tree.  He is my first Rudolph purchase and I think he is just so cute.  I colored him with my Copics and used a black gel pen on his nose (since I didn't have time to wait for glossy accents to dry).  I used the colorless blender to add a little detail to the tree.

Bugaboo Stamps - Rudolph with Tree

I used the My Favorite Things stitched rectangles and squares to cut my pieces from from the 6x6 paper pad Santa Express by Doodlebug Design. I have used almost the whole pad this year.  Such cute papers.

Thanks for stopping by,

Melanie


Ornament Bear

Today I have another Christmas card.  I used the adorable new Ornament Bear image from Bugaboo Stamps.  Jodie always has the cutest images over there.  I colored my bear with Copics, and then used lots of Wink of Stella on the white trim and the ornaments.  I used a gold jell pen for the ornament tops.

Bugaboo Stamps - Ornament Bear

I used Glossy Accents on her nose, and a white jell pen to add some dots of her cheeks.  The papers are from the Christmas Time by Carta Bella 6x6 paper pad pack.  

Thanks for stopping by,

Melanie 

Friday, December 5, 2014

Christmas Sweater

Good morning.  I have had difficulties with Blogger and haven't been able to post.  Very frustrating, as I have made a couple cute cards in the past week. 

The one I picked to post today uses the Hero Arts Christmas Reindeer stamp.  I saw something every similar to this on line and had to make one myself.  Sorry, I don't remember the website where I saw it, or I would link it.

Hero Arts - Christmas Reindeer
 

Not sure why, but this card took me forever.  I stamped the reindeer, colored them with my Copics, and then cut each one out.  I cut a background hill out of white cardstock, and then used the tree stamp from the same set and stamped the trees in the background.  I just used Word to type and print my sentiment on cardstock.

Once together I used Wink of Stella, Glossy Accents and a white and black gel pen to add some detail.  I love how it turned out.

Thanks for stopping by,

Melanie

Thursday, November 20, 2014

Winter Birds on a Limb

I'm back today with Christmas card.  This time its an image from Bugaboo Stamps.  Jodie just has the cutest images on her website.  I used the Winter Birds on a Limb.

Bugaboo Stamps - Winter Birds on a Limb

I had so much fun coloring all their accessories.  I use Wink of Stella, Glossy Accents, Ranger Enamel Accents, and a Snow Marker.  The greetings stamp in from Lawn Fawn.

Thanks for stopping by,

Melanie

Wednesday, November 19, 2014

Shaker Snow Bunnies

I found a little more time to play last.  This time I used the tress and bunnies from Lawn Fawn's Snowy Days stamp set.  Those little bunnies are just so darn cute.  I also used the hillside borders from Lawn Fawn to cut my snow banks.  I used the stitched rectangles from My Favorite Things (I don't have the Lawn Fawn ones).  

Lawn Fawn - Snowy Days


Sorry, the picture has a glare.

This was my second attempt at a shaker card.  I used Memento Inks for my trees and Copics to color the bunnies.  I added a little detail with a white gel pen.  

Thanks for stopping by,

Melanie

Thursday, November 13, 2014

Santa - Whimsie Doodles

I have another Christmas card today.  The image is from the Santa & Friends digi set over at Whimsie Doodles.  It's such a cute set with four images.


Whimsie Doodles - Santa & Friends

I did some very basic coloring with Copics and used papers from the Doodlebug Santa Express 6x6 paper pad.  I used a Snow Marker from Uchida for the trim on his hat and coat.  I love the way it puffs up.  I coated his coat and hat with clear Wink of Stella and put some Glossy Accents on his belt.  I finished off the belt buckle with a Uni Ball Signo pen in gold. Here's a close up for some of the detail.


Thanks for stopping by.

Melanie

Wednesday, November 12, 2014

Snowman Card

Surprise.  Yes that's right.  More snowmen.  Today, I have a scene of them.  I love the images that Jodie designs over at Bugaboo Stamps. When I saw the "scene it - snowmen fun" I knew I had to get it.  I decided to do an A6 card (4 1/2 x 6 1/4).  I didn't want to make the scene too small.  


Bugaboo Stamps - Scene it - Snowmen Fun

I used Stickles, Glossy Accents, Wink of Stella, White Gel Pen, and Ranger Enamel Accents in White.  I love all the texture.  This card went together super quick.  

Thanks for stopping by,

Melanie 

Tuesday, November 11, 2014

Snowman Ornaments

I'm back again with a few more ornaments that I made.  This time using snowman stamps from Paper Smooches and Lawn Fawn.  I admit I have a snowman addiction.  I have loved snowman for as long as I can remember.  

Paper Smooches -- Swanky Snowman
Hero Arts - Christmas Reindeer (trees)

Paper Smooches -- Swanky Snowman
Hero Arts - Christmas Reindeer (trees)

Lawn Fawn -- Making Frosty Friends
Again, I totally got this idea from a YouTube video that I mentioned in my reindeer ornament post.

I had a good time using Wink of Stella and Glossy Accents on the snowman, as well as Stickles.  I even used gumdrops from Your Next Stamp as the buttons, and some snowflake buttons I found at Michaels.  

I inked the wooden ornaments with Distress Inks.  The snow was made with texture paste and theSimon Says Stamp Falling Snow Stencil.  I need to learn to be more patient and let the ink dry before adding the texture paste so it doesn't absorb the color from the inks.   I painted the edges of the paper mache ornament and then cut a circle from blue card stock for the background.  

I'm looking forward to making some more of these with my girls. Thanks for stopping by,

Melanie

Thursday, November 6, 2014

Reindeer Ornament

First, I have to admit that I totally got this idea from a video I watched on YouTube posted by "myserenitycrafts".  It was the "Snowman Ornament Tutorial for Beginners".  Sara showed this great idea using paper mache ornaments and stamps together.  I loved it.  So, here's the first one I did.

Reindeer Ornament

I got the paper mache ornament at Michaels.  I painted it with Martha Stewart Pearl Gold paint.  I used some really old Creative Memories paper for the background.  The reindeer and sentiment are from Hero Arts, Christmas Reindeer.  The trees are the "Forest Border" die from Lawn Fawn.  The red string beads are also from Michaels.  

I used Wink of Stella on the sweater and trees, and Glossy Accents on his nose.  I also used Sakura Glaze glossy black ink pen on his hoofs. I had a lot of fun making this and have been working on some snowmen for the next one.  My girls are going to be making these for Christmas presents this year for their aunts and uncles.  

Thanks for stopping by,

Melanie 

Wednesday, November 5, 2014

Nutsy with Present

Back today with another Christmas card using a digi image from Karens Doodles.  This time I used my Copics to color up the cute Nutsy with Present image.  Who doesn't love a Christmas squirrel?  


Nutsy with Present -- Karens Doodles

I kept the layout pretty simple since the image is so adorable. The paper is from Doodlebug's Santa Express 6x6 paper pad.


Here's a close-up showing the detail of the digi image itself.  I used my Signo Uni-Ball white gel pen to put dots on the present and lines on the nut shell.  I then used some Glossy Accents on his nose for a little shine.  

Thanks for stopping by,

Melanie 

Thursday, October 23, 2014

Dancing Snowmen

I had some time to play last night and I created two more Christmas Cards.  This time I used a digi image from digistampboutique.com. There are some really cute images there.  I found these three little happy snowmen there.  

I pulled out some watercolor paper and Tim Holtz distress inks.  I did a dark purple and dark blue sky background with the inks and some water.  After I dryed it, I then used the Simon Says Stamp's "Falling Snow" stencil and added the snow with texture paste.  I then fussy cut out the snowmen and added them to the background.  I loved how it turned out.


Below is close up of one of the snowmen.  I used glossy accents on his hat, nose and buttons.  I used a white gel pen to add the polka dots and stripes to the scarf and hat.  


Next I used the second panel I had printed and colored it slightly different than the first.  I add a punched border at the top and bottom and adhered it to the card front.  


Here is a close-up of one of the snowman.  I used Wink of Stella clear on all the snowmen on this card.  I did a few extra touches with my white gel pen as well.  


Thanks for stopping by,

Melanie 

Wednesday, October 22, 2014

Bovine Betty

My second Christmas card of the season.  I used another karensdoodles.com image.  This time it was Bovine Betty. What's not to love about a Christmas cow?  Look at her beautiful eyes.  

Bovine Betty -- Karensdoodles.com

I loved the image so much I wanted to keep my card very simple.  I used a stitched rectangle to cut out the image and then a frame from the Elegant Edges Cricut cartridge.  

I used Wink of Stella clear on the white trim of her coat for just a little shimmer.  

Thanks for stopping by,

Melanie


Monday, October 20, 2014

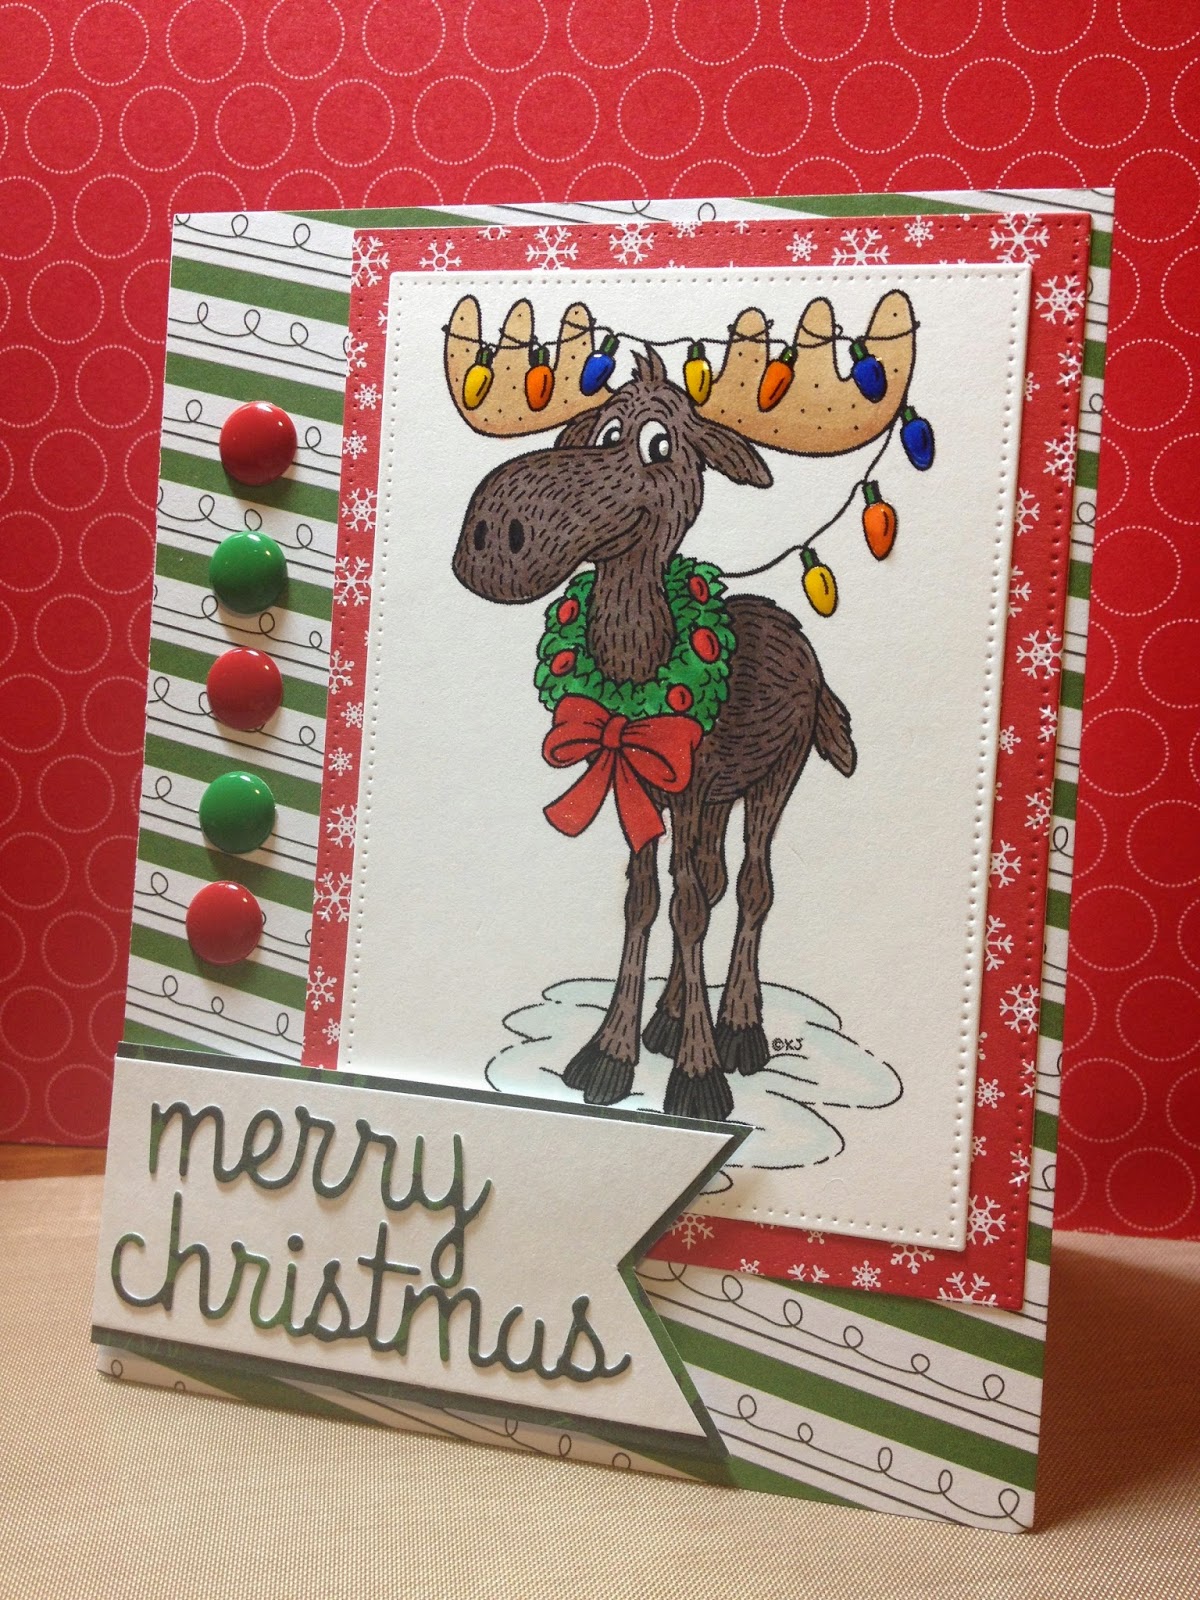
Christmas Moose

I started working on Christmas cards last week.  I found some cute digi images at karensdoodles.com.  I downloaded the Christmas moose and sized him up.  I then colored him with my Copics.     

Christmas Moose - karensdoodles.com


I used some Glossy Accents on the bulbs.  The paper is from a new Christmas 6 x 6 paper pad and the enamel dots are from Your Next Stamp.  I really like the enamel dots they have.  The Merry Christmas sentiment is a steel die from Simon Says Stamp.  

Thanks for stopping by,

Melanie

Friday, October 17, 2014

Piles of Smiles

Moving past Halloween cards and on to Fall.  I recently discovered My Next Stamp and the adorable set Piles of Smiles.  I think the squirrel holding the nut is so cute.  Of course, I used my Copics to color him.

I came across a folder in a drawer with some backgrounds that a friend had given me a few years ago that she had stamped.  I wasn't really making cards then, just scrapbooking so I put them away. Well the pumpkin one was perfect for the squirrel I stamped.

I used the My Favorite Things stitched squares and the elegant edges cartridge to cut the dots borders.

Your Next Stamp - Piles of Smiles

Sorry, the picture isn't as clear as I had thought. I used glossy accents on his nose and enamel dots for his eyes.  

Thanks for stopping by,

Melanie 

Thursday, October 16, 2014

Turkey Time Freebie

Watch out.  I found another site of great digi images... Karensdoodles.com.  I picked up this cute Tom Turkey for free from her site yesterday.  I colored him with my Copics.  I then used the My Favorite Things pierced square to cut him out, and then used my Cricut machine to cut the frame.  The elegant edges cartridge has an endless selection of borders and frames. I used the stamp setting and cut the frame for the turkey.

My papers are from a paper pack that I got at Michael's probably five or six years ago.  The sentiment is from the Your Next Stamp set "Piles of Smiles" and the enamel dots are also from Your Next Stamp.  I just love all the colors and how they tied together.

Turkey Time Freebie -- Karen Doodles digi image

Thanks for stopping by,

Melanie

Tuesday, October 14, 2014

Stella and Stu

In all my coloring of images for Halloween cards, my favorite has been Stella and Stu from Meljen's Designs. I made two cards and have been waiting to mail them last.  I decided I needed to color these two characters for myself. 

I used some the techniques I learned in the online Copics card class that I just finished.  Like hiding mistakes or when color bleeds outside the lines.  

I am really enjoying digi images and how I can make a scene with them.  This time I added in Nibbles the Zombie Cat and love how it turned out.  

Meljen's Designs - Stella, Nibbles, and Stu

I am not going to make this into a card, but instead use it in my scrapbook for my girls on their Halloween page.


Thanks for stopping by.  

Melanie

Friday, October 10, 2014

One Strut Closer

I don't like to do special request cards. I didn't like it when I did other crafts either.  I prefer to just do my thing and go with it.  That being said, I have a very dear co-worker and her daughter has purchased several cards from me.  Helps to fund my new toys for craft time.  She wanted a girly, girl card for a friend as a congratulations card. 

I had this beautiful high heel silhouette image from Bugaboo Stamps.  I re-sized the image in Microsoft Word and created the phrase that she wanted.  I used the stitched ovals from My Favorite Things and cut the image and sentiment out.  I used my Circuit and the elegant edges cartridge to cut the frame for the image.  I inked the edge of the oval before adhering it to the frame.

I blinged it up with clear Wink of Stella and some rhinestones and ribbon from my stash.  The papers are from Stampin' Up and Creative Memories.  Happy to use more paper from my stash.  I hope she likes it.

Bugaboo Stamps - High Heel Silhouette

Close up showing Wink of Stella 
Thanks for stopping by,

Melanie


Wednesday, October 8, 2014

Going Batty

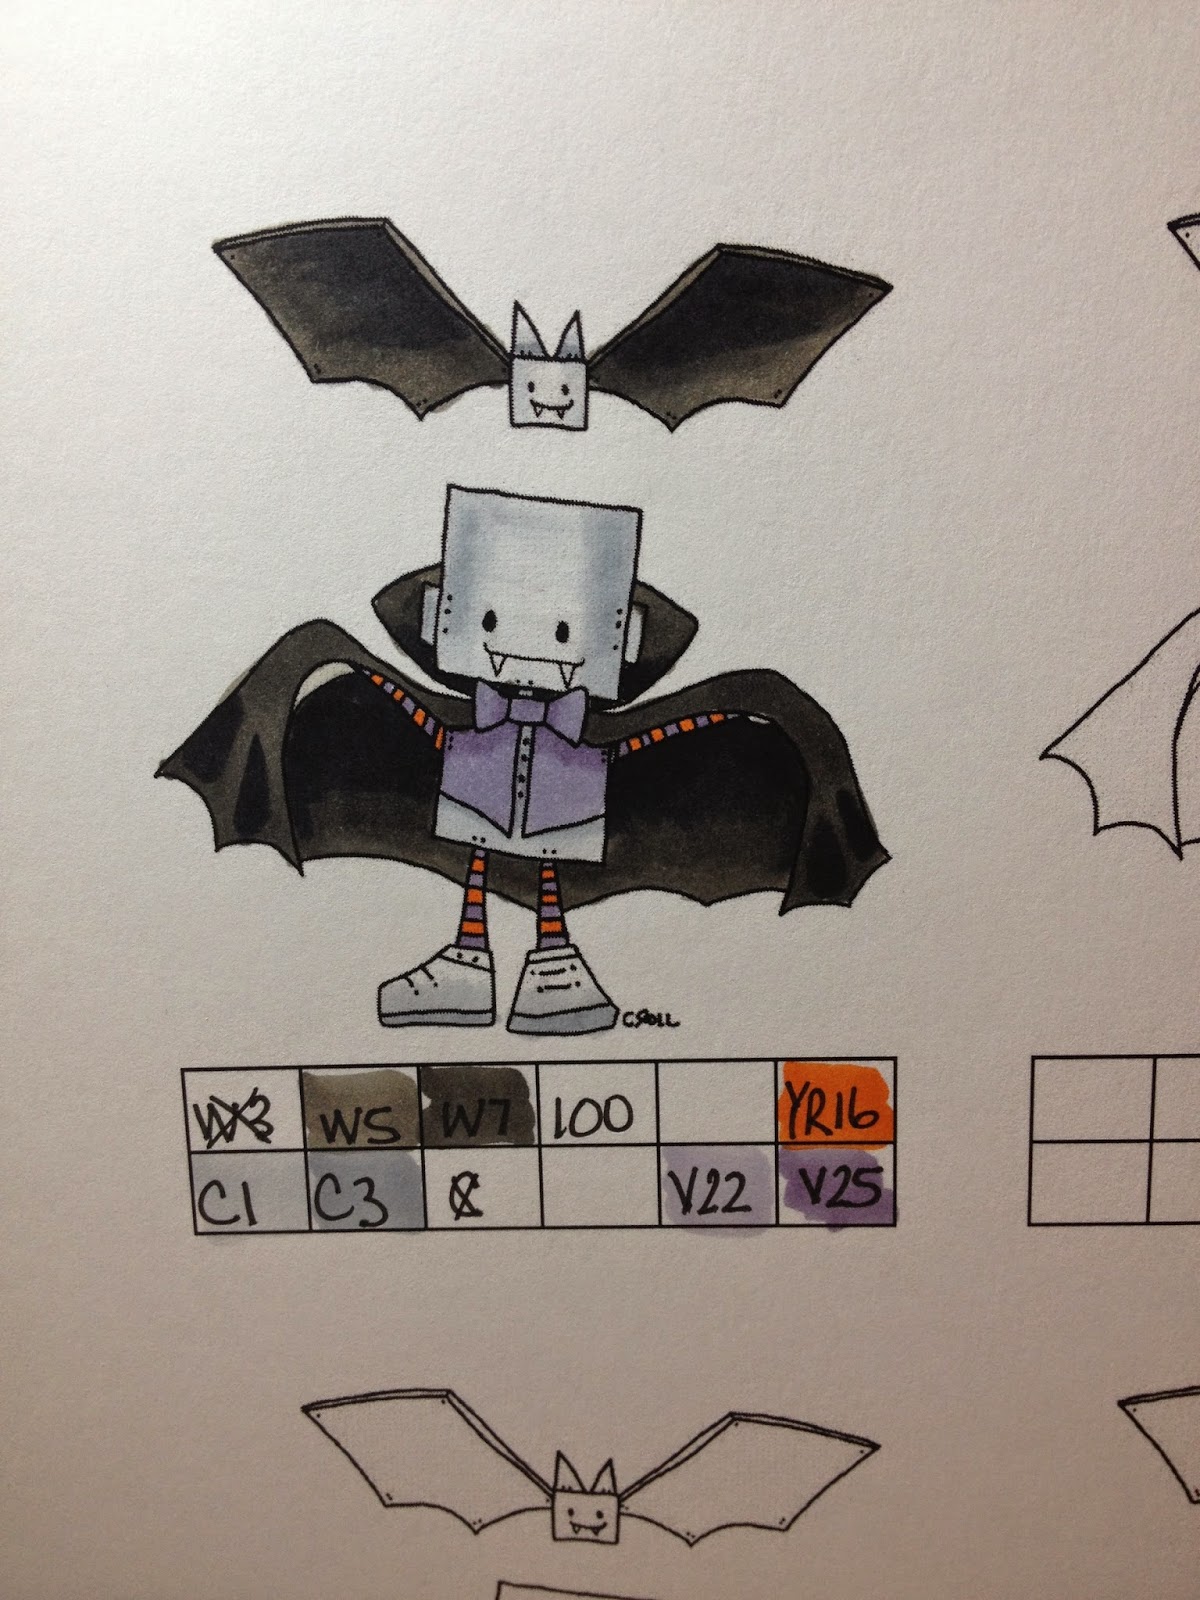
I used an image from my Copics class day 7 practice sheet to make another Halloween card.  The little robot guy and bat were too cute not to make into a card.  

I used paper from the Doodlebug Ghouls and Ghosts 6x6 paper pad.  I love all those papers and have used half my pad with all the Halloween cards I have done so far this year. 


The sentiment is from a sheet for sayings that I did up in Word using different fonts and saying and just printed them on cardstock.  I didn't have a lot of Halloween sayings, and decided to try out my own homemade sayings.  It worked really well.

You can see my Copics and other markers storage in the background. Day 12 of the class discussed how everyone stores their markers and how to care for your markers.  I have these great cubbies from Studio 3 and I have all my markers in them.  I have two, but am in need a third one since my marker collection has grown.  I have all my Creative Memories, Tim Holtz, Wink of Stella, and other brands in the bottom two rows.  My girls know which ones they are allowed to use, and which ones they have to ask me to use.  They are already addicted to Copics.  The apple doesn't fall far from the tree.  

Thanks for stopping by,

Melanie

Tuesday, October 7, 2014

Trick or Treat

Copics classes have been great.  I have learned so much.  I did another Halloween card.  This time I used the Simon Says Clear Stamp Treat or Trick.  I was really struggling when I made this card. The first cat I colored did not turn out well at all. The second one was okay, but then I dropped the sentiment stamp on my card and ruined it. I was trying to do a one layer card.   I then decided to cut the second cat out and put him on an inked background.   I used distress inks to do the background.  I used my copics to color the adorable little cat.  I fussy cut the cat out and used a black marker to hide the white edges.  I did a little gray shadow shading under the cat on the inked background. I then embossed the greeting from the same stamp set. 


Close up of cat.
Thanks for stopping by,

Melanie
Wednesday, October 1, 2014

Copics Class - Day 7 Part 2

Needed to post a part two in order to link my robot vampire.  


Thanks for stopping by,

Melanie

Copics Class - Day 7

Day seven was all about difficult colors.  I used the same colors (as close as I could get) as the instructor and then did my own as well.  I really like the yellow flowers, but then again yellow is one of my favorite colors.  I love the robot vampire. He's just such a cute image.


Thanks for stopping by,

Melanie

Friday, September 26, 2014

Copics Clas - Day 4 and 5

I didn't have a chance to do my day 4 worksheet last night so I did it tonight as well as day 5.  Day 4 was about directional shading, and day 5 was skin tones and hair.  Here are my worksheets.

Day 4

I used so much ink that I had a hard time with the ink bleeding everywhere.  I like the colors, just need to use less ink.

 
Day 5

I colored several head and hair combos before coloring this whole image.  I liked the redhead combination best.  My blonde did not turn out well at all.  I used a clear wink of stella on her dress after I was done coloring.

More practicing this weekend, and class resumes on Monday.

Thanks for stopping by,

Melanie

Wednesday, September 24, 2014

Copics Class -- Day 3

Day 3 was all about gray shading.  Here's my worksheet from today.


Thanks for stopping by,

Melanie 

Tuesday, September 23, 2014

Copics Class - Day 2

Today was about blending tricks.  Tip to tip blending, acetate blending, and feathering trick.  Here is my worksheet.


Thanks for stopping by,

Melanie

Monday, September 22, 2014

Copics Class - Day 1

I normally do not like Mondays, since it means I have to go back to work.  But today, was the first day of the On-Line Copics Card Class.  The teachers are great.  There were four videos today.  We practiced blending with two or three color combinations.  Here is my worksheet from today's lessons.


Thanks for stopping by,

Meanie  

Thursday, September 18, 2014

Witch Way is the Candy

I have another Halloween card today.  I used the My Favorite Things stamp set called "Witch Way is the Candy" to do up this super cute little witch and black cat.

My Favorite Things -- Witch Way is the Candy

I colored the witch and the cat with my Copics and used some more of the Doodlebug Ghouls and Goodies paper for the layers.  

Thanks for stopping by,

Melanie 

Monday, September 15, 2014

Franken Kitty

I'm still having fun making Halloween cards.  I whipped up another digi stamp from Meljen's Designs.  This one is called Franken Kitty.  I used more paper from the Doodlebug Ghouls & Goodies 6x6 paper pad.  I love those papers.  

Meljen's Designs - Franken Kitty

Thanks for stopping by,

Melanie

Friday, September 12, 2014

Nermin the Fox - Trick or Treat

I colored another image from Meljen's Designs this week. This time it was Nermin the Fox Trick or Treat.  I just love this little guy with his mouth open asking for candy.  I printed him on Copic paper (instead of the usual Georgia Pacific I use) and I really like it.  It makes blending even easier.  I'm going to be taking the Copic class offered by Online Card Classes starting on September 22nd, and I can't wait to improve my coloring.  In the meantime, here's Nermin.

Meljen's Design - Nermin the Fox Trick or Treat

Thanks for stopping by,

Melanie

Wednesday, September 10, 2014

Little Frankie

I have another Halloween card today.  I used the "Little Frankie" digi stamp from Meljen's Designs.  I colored him up with my Copics.  I used the pierced ovals STAX from My Favorite Things to cut him out and the Cricut Elegant Edges cartridge to cut the frame for my oval.  I finished him off with paper from the Doodlebug Ghouls and Goodies 6x6 pad.  I am loving that paper pad for all my Halloween cards.

Meljen's Designs -- Little Frankie

A closer look at Frankie

Thanks for stopping by,

Melanie

Tuesday, September 9, 2014

Halloween Scene

I have been on a Halloween card kick for a while now.  I still have more images that I want to color.  I found this glittered house in the clearance section of Michaels last week.  I inked up the background with Tim Holtz distress inks and used the My Favorite Things "Treat or Trick" stamp set for the little zombie guy and moon.  Its very simple, but I think it turned out okay.  

My Favorite Things -- Trick or Treat

Thanks for stopping by,

Melanie